Shoutboxes and chat scripts have been very popular in recent times, especially with jQuery and AJAX becoming more mainstream. This article will take you through how to create a Facebook chat / shoutbox in PHP 5 OOP, MySQL, HTML 5, CSS 3, and jQuery.
Before we get started, please ensure you’re running at least PHP 5.3.
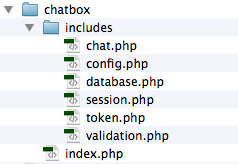
Here is the document structure we’ll be using for the Facebook style chat / shoutbox:
Chatbox HTML
Before we get started creating the back-end, we’ll create the HTML and CSS for our Facebook style chat box. The HTML itself is very simple. For this example I’ve used HTML 5, if your doctype is HTML 4 then you’ll need to make some minor adjustments.
[html]
<div class="chat_wrap">
<div class="toggle">
<h3>Chat</h3>
</div>
<div class="chat">
<header>
<h3 class="toggle">Chat</h3>
</header>
<div class="chatArea">
<ul>
<li><em>Loading…</em></li>
</ul>
</div>
<form method="post">
<input type="text" name="chat_name" id="chat_name" maxlength="15" placeholder="Name" required>
<input type="text" name="chat_message" id="chat_message" maxlength="140" placeholder="Message" required autocomplete="off">
<input type="hidden" name="chat_token" id="chat_token" value="<?=$token->set();?>">
</form></div>
</div>
[/html]
The only thing to note is the addition of a PHP echo in the chat_token form field. This will interact with our CSRF/XSRF class.
Here’s the CSS –
[css]* {
box-sizing: border-box;
font-family: "Noto Sans", Arial;
margin: 0;
padding: 0;
}
div.chat_wrap {
bottom: 0;
display: block;
font-size: .85em;
position: fixed;
right: 3rem;
width: 255px;
}
div.chat_wrap > div.toggle {
background: rgb(250,250,250);
background: linear-gradient(to bottom, rgb(250,250,250) 0%,rgb(240,240,240) 100%);
border: 1px solid rgba(0,0,0,.1);
color: rgba(0,0,0,.4);
display: none;
font-weight: bold;
padding: .45rem 0;
text-align: center;
}
.toggle:hover {
cursor: pointer;
}
div.chat {
display: block;
}
div.chat > header {
background-color: rgb(76, 102, 164);
background: linear-gradient(to bottom, rgba(76,102,164,1) 0%,rgba(62,77,132,1) 100%);
border: 1px solid rgba(0,0,0,.1);
border-radius: 2px 2px 0 0;
display: block;
line-height: 2.25rem;
}
div.chat > header > h3 {
color: rgb(255,255,255);
display:block;
margin: 0;
padding: 0;
text-align: center;
}
div.chat > div.chatArea {
background: rgb(250,250,250);
border: 1px solid rgba(0,0,0,.1);
border-top: none;
display: block;
height: 160px;
font-size: .9em;
overflow: auto;
padding: .25rem .65rem;
}
div.chat > div.chatArea > ul {
list-style-type: none;
}
div.chat > div.chatArea > ul > li {
padding: 0 0 .45rem;
}
div.chat > div.chatArea > ul > li.time {
color: rgba(0,0,0,.35);
font-size: .85em;
font-weight: bold;
text-align: center;
text-transform: uppercase;
}
div.chat input {
border: none;
border: 1px solid rgba(0,0,0,.1);
border-top: none;
display: block;
padding: .35rem .5rem;
width: 100%;
}[/css]
Setting up MySQL
After creating a new MySQL database and user, you’ll need to create the MySQL chat table. To do this you’ll need to run the following query –
[sql]CREATE TABLE IF NOT EXISTS `chat` (
`chat_id` int(11) NOT NULL AUTO_INCREMENT,
`name` varchar(15) NOT NULL,
`message` varchar(140) NOT NULL,
`ip` varchar(18) NOT NULL,
`time` int(11) NOT NULL,
`delete` int(11) NOT NULL DEFAULT ‘0’,
PRIMARY KEY (`chat_id`)
) ENGINE=InnoDB DEFAULT CHARSET=latin1 AUTO_INCREMENT=1 ;[/sql]
We’ll be setting an auto incrementing primary key with the field chat_id. Additionally, we’ll use a delete field to keep all messages stored until they require manual deletion.
PHP Config
With a MySQL database and table created, we need to store the MySQL log-in details so that we can connect to the database. We also need to start the output buffer and session buffer.
[php]<?php
ob_start();
session_start();
// MYSQL
$mysql_config = array(
‘db’ => ‘chat’,
‘host’ => ‘localhost’,
‘options’ => array(),
‘pass’ => ”,
‘user’ => ‘root’,
);
// SITE
define(‘SITE’,true);
// USER IP
function getIP() {
return getenv(‘HTTP_CLIENT_IP’)?: getenv(‘HTTP_X_FORWARDED_FOR’)?: getenv(‘HTTP_X_FORWARDED’)?: getenv(‘HTTP_FORWARDED_FOR’)?: getenv(‘HTTP_FORWARDED’)?: getenv(‘REMOTE_ADDR’);
}
define(‘IP’, getIP());
?>[/php]
You’ll need to edit the array to add your MySQL information. We’ve also made two definitions, one to get the IP address, the other to stop direct file access to our classes.
Save this as config.php within the /includes folder.
Index – Autoloading & Includes
The index file will be used as the base for everything with our code. Firstly we’ll want to include the config file, then we need to include our classes. With the spl_autoload_register() function in PHP, this becomes much simpler.
[php]<?php
// Load config.php
include_once(‘includes/config.php’);
// Autoload classes
spl_autoload_register( function($class) {
include_once(‘includes/’.strtolower($class).’.php’);
});
?>[/php]
Using autoload means you don’t have to include each individual class file, simply start the class and it’ll go looking for the file for you. With that being said, let’s also start our classes –
[php]// Instigate classes
$db = new Database($mysql_config);
$session = new Session();
$token = new Token($session);
$chat = new Chat($db, $token, $session);[/php]
This code will make more sense as we go through the article. Looking at the Database call, we’re passing the $mysql_config variable (set within config.php).
PDO Database Interface
The mysql_* PHP functions have been deprecated and will soon be removed. For that reason, it’s adviced to use mysqli_* or PDO. My personal preference is PDO due to its increased flexibility.
The following class will provide us with an interface for PDO. First we’ll start by creating a class constructor that will take the connection array and store it in class variables –
[php]<?php
if(!defined(‘SITE’)) {
die(‘
<h1>Invalid file access</h1>
‘);
}
class Database {
// Stored connection
private $_connection = null;
// Database config
protected $dbconfig = array();
// Query results
private $_results_object;
private $_count;
// Query error flag
private $_error = false;
private $_error_message = array();
public function __construct(array $db_info)
{
if( !isset( $this->dbconfig[‘dsn’] ) ) {
$this->dbconfig[‘dsn’] = ‘mysql:host=’ . $db_info[‘host’] .’; dbname=’. $db_info[‘db’] .’; charset=utf8′;
$this->dbconfig[‘username’] = $db_info[‘user’];
$this->dbconfig[‘password’] = $db_info[‘pass’];
$this->dbconfig[‘driverOptions’] = $db_info[‘options’];
}
}[/php]
Here are a couple of points –
$_connection– used to store the active PDO instance$dbconfig– stores an array of the MySQL config__construct()– checks if the config has already been set, saves the config in a class variable
Now let’s build our connection function.
[php]public function connect()
{
if($this->_connection) {
return;
}
try {
$this->_connection = new PDO(
$this->dbconfig[‘dsn’],
$this->dbconfig[‘username’],
$this->dbconfig[‘password’],
$this->dbconfig[‘driverOptions’]);
$this->_connection->setAttribute( PDO::ATTR_ERRMODE, PDO::ERRMODE_EXCEPTION );
$this->_connection->setAttribute( PDO::ATTR_EMULATE_PREPARES, false );
}
catch (PDOException $e) {
throw new RunTimeException($e->getMessage());
}
}[/php]
This is very simple as it takes our stored variables and places them into the predefined PDO class constructor.
Now we’ll create the final three functions of the class. First we need a function to query the database, next we need a function to count our query results, then a final function to return the results. The hard work in this class is done predominantly by the query function.
[php]public function query($query, $data = array())
{
$this->connect();
$this->_query = $this->_connection->prepare($query);
if($this->_query->execute($data)) {
$this->_count = $this->_query->rowCount();
$this->_results_object = $this->_query->fetchAll(PDO::FETCH_OBJ);
}
else {
throw new RuntimeException(‘There has been a problem executing the following query: ‘ . $query);
}
return true;
}
public function fetch()
{
return $this->_results_object;
}
public function count()
{
return $this->_count;
}[/php]
Here’s the query function explained –
- Run the connection function
- Prepare the query to be executed
- Execute the query, binding parameters to the query string
- Count the results in a class variable
- Store the results as a class object
- Any problems will throw an exception (error)
Here’s the full database.php class
[php]<?php
if(!defined(‘SITE’)) {
die(‘
<h1>Invalid file access</h1>
‘);
}
class Database {
// Stored connection
private $_connection = null;
// Database config
protected $dbconfig = array();
// Query results
private $_results_object;
private $_count;
// Query error flag
private $_error = false;
private $_error_message = array();
public function __construct(array $db_info)
{
if( !isset( $this->dbconfig[‘dsn’] ) ) {
$this->dbconfig[‘dsn’] = ‘mysql:host=’ . $db_info[‘host’] .’; dbname=’. $db_info[‘db’] .’; charset=utf8′;
$this->dbconfig[‘username’] = $db_info[‘user’];
$this->dbconfig[‘password’] = $db_info[‘pass’];
$this->dbconfig[‘driverOptions’] = $db_info[‘options’];
}
}
public function connect()
{
if($this->_connection) {
return;
}
try {
$this->_connection = new PDO(
$this->dbconfig[‘dsn’],
$this->dbconfig[‘username’],
$this->dbconfig[‘password’],
$this->dbconfig[‘driverOptions’]);
$this->_connection->setAttribute( PDO::ATTR_ERRMODE, PDO::ERRMODE_EXCEPTION );
$this->_connection->setAttribute( PDO::ATTR_EMULATE_PREPARES, false );
}
catch (PDOException $e) {
throw new RunTimeException($e->getMessage());
}
}
public function query($query, $data = array())
{
$this->connect();
$this->_query = $this->_connection->prepare($query);
if($this->_query->execute($data)) {
$this->_count = $this->_query->rowCount();
$this->_results_object = $this->_query->fetchAll(PDO::FETCH_OBJ);
}
else {
throw new RuntimeException(‘There has been a problem executing the following query: ‘ . $query);
}
return true;
}
public function fetch()
{
return $this->_results_object;
}
public function count()
{
return $this->_count;
}
}
?>[/php]
Session Class
Next we’ll create a session handler class. This will check the existence of a specified session, get a session, destroy a session, and store values in a session.
[php]<?php
if(!defined(‘SITE’)) {
die(‘
<h1>Invalid file access</h1>
‘);
}
class Session {
public function put( $name, $value )
{
return $_SESSION[$name] = $value;
}
public function exists( $name )
{
return ( isset($_SESSION[$name])) ? true : false;
}
public function get( $name )
{
return $_SESSION[$name];
}
public function destory( $name )
{
if( $this->exists($name)) {
unset( $_SESSION[$name] );
}
return true;
}
}
?>[/php]
Creating a Token Class – CSRF Protection
Cross site request forgery definition –
Cross-site request forgery, also known as a one-click attack or session riding and abbreviated as CSRF (sometimes pronounced sea-surf) or XSRF, is a type of malicious exploit of a website whereby unauthorized commands are transmitted from a user that the website trusts. Unlike cross-site scripting (XSS), which exploits the trust a user has for a particular site, CSRF exploits the trust that a site has in a user’s browser.
PHP 5 Dependency / Constructor Injection
Managing cross class dependencies has become a hot topic in recent times. Practises such as singleton instances are looked down on and are discouraged. The answer to this debate is to use constructor / dependency injection.
If you’re struggling to understand what I’m talking about, consider this… We want to create a Token class that sets a form token and then checks it when the form is submit. To handle this we need to use sessions. Now we have our session class, but let’s say we’re using static methods such as Session::get(). If we change the name of the session class then we’ve got to go through changing it in every class. This would represent a tight cross class coupling, something we don’t want.
Here’s how to utilise dependency / constructor injection in PHP 5.
[php]public function __construct(Session $session)
{
if(!isset($this->_session)) {
$this->_session = $session;
}
}[/php]
The __construct() function is called when we initiate the class. When initiating the class we need to pass the session class to the constructor. The class constructor then takes that instance and places it in a class object.
This means that if we change our session class name, we only need to change the name when initiating the class – which would probably only be once.
CSRF/XSRF Protection Class
[php]<?php
if(!defined(‘SITE’)) {
die(‘
<h1>Invalid file access</h1>
‘);
}
class Token {
// Session dependency
protected $_session = null;
// Store the security token for forms
private $_token = array();
// Key for active token
private $_active_token_key;
public function __construct(Session $session)
{
if(!isset($this->_session)) {
$this->_session = $session;
}
}
public function set()
{
$this->_token = md5(uniqid(”, true));
return $this->_session->put( ‘_token’, $this->_token );
}
public function check( $token )
{
if( $this->_session->exists( ‘_token’ ) && $token == $this->_session->get( ‘_token’ ) ) {
return true;
}
}
}
?>[/php]
Chat / Shoutbox Class
With the knowledge of dependency injection, we can build the most pivotal class – the chat class. This has dependencies with database, token, and session classes. Let’s start by creating the class variables and defining the construct method.
[php]<?php
if(!defined(‘SITE’)) {
die(‘
<h1>Invalid file access</h1>
‘);
}
class Chat {
// Database dependency
protected $_db = null;
// Token dependency
protected $_token = null;
// Session dependency
protected $_session = null;
// Validation instance
private $_validation = null;
public function __construct(Database $db, Token $token, Session $session)
{
if(!isset($this->_db)) {
$this->_db = $db;
}
if(!isset($this->_token)) {
$this->_token = $token;
}
if(!isset($this->_session)) {
$this->_session = $session;
}
}[/php]
So far this should be looking straightforward and similar to previous classes. Next we want to create a function to get the chat messages from the MySQL database.
[php]public function getPosts()
{
$query_data = array(
‘two_weeks’ => strtotime(‘-2 weeks’),
);
$this->_db->query(‘SELECT chat.chat_id
FROM chat
WHERE chat.delete = 0
AND chat.time > :two_weeks’, $query_data);
$total_messages = $this->_db->count();
if( $total_messages > 0 ) {
$query_data[‘offset’] = ($total_messages – 50);
$query_data[‘limit’] = $total_messages;
$this->_db->query(‘SELECT chat.chat_id
, chat.name
, chat.message
, chat.time
FROM chat
WHERE chat.delete = 0
AND chat.time > :two_weeks
LIMIT :offset, :limit;’, $query_data);
$i = 1;
$posts = ”;
$previous_post_time = time();
foreach($this->_db->fetch() as $row) {
if((($row->time – $previous_post_time) > 3600) || $i === 1) {
$posts .= ‘
<li class="time">’.date(‘l jS F G:i’, $row->time).'</li>
‘;
}
$posts .= $this->formatMessage($row->name,$row->message);
$i += 1;
$previous_post_time = $row->time;
}
return $posts;
}
else {
throw new RuntimeException(‘There are currently no messages to be displayed’);
}
}[/php]
Here’s a little explanation for you –
- Store an array of query data that gets bound to the MySQL query
- Query the database to count how many posts there has been in the last two weeks
- Check there are posts to be shown, if not then throw an exception
- Add an offset and limit to the main query string
- Run the select query, passing the query data array to the query function
- Set some loop variables
- Loop through the query results, setting each message as part of the
$rowobject - Check if the time between the last 2 posts is greater than 1 hour, or if it’s the first result
- If it is, show the time and date to group the messages
- Pass the
$row->nameand$row->messagevariables to theformatMessage();function, adding the results to a string - Add 1 to the row count and set the previous post time variable
- Return the posts as a string
Combined with the getPosts(); function is the formatMessage(); function. This will take our variables and place them into a basic HTML string. If you’re using a template engine, this is the place to implement it.
[php]private function formatMessage($name, $message)
{
$message = wordwrap($message, 22, ‘ ‘, true);
return ‘
<li><strong>’.$name.’:</strong> ‘.$message.'</li>
‘;
}[/php]
This is a very simple function, but it allows us to format a message string in one place, rather than rewriting the same code. In the future if you want to change the format of the message string, you’ll only have to modify one function.. much quicker! Additionally, the code uses the PHP function wordwrap();, this breaks long words/strings to keep the chatbox tidy.
The final two functions in the chat class are addMessage() – used to insert a new message in the database, and clean() – used to clean user inputs before passing them to the datbase.
[php]public function addMessage($name, $message, $token)
{
if($this->_token->check($token)) {
$anti_spam = $this->_session->get(‘anti_spam’);
if($anti_spam <= time()) {
$message = $this->clean($message);
$name = $this->clean($name);
$this->_validation = new Validation();
if($this->_validation->check(array(
‘chat_message’ => array(
‘max’ => 140,
‘min’ => 2,
‘required’ => true,
‘value’ => $message,
),
‘chat_name’ => array(
‘max’ => 15,
‘min’ => 2,
‘required’ => true,
‘value’ => $name,
)
))->passed()) {
$query_data = array(
‘ip’ => IP,
‘message’ => $message,
‘name’ => $name,
‘time’ => time(),
);
$this->_db->query(‘INSERT INTO chat (name, message, time, ip) VALUES (:name, :message, :time, :ip);’, $query_data);
$this->_session->put(‘anti_spam’,strtotime(‘+5 seconds’));
return ‘
<li class="time">You</li>
‘ . $this->formatMessage($name,$message);
}
else {
throw new RuntimeException(implode(‘, ‘, $this->_validation->errors()));
}
}
else {
throw new RuntimeException(‘You cannot post multiple messages within 5 seconds of eachother’);
}
}
else {
throw new RuntimeException(‘Invalid post token used when adding a message’);
}
}
private function clean($string)
{
return htmlspecialchars(strip_tags($string), ENT_QUOTES,’UTF-8′,false);
}[/php]
The clean function is very simple and is designed to reduce the risk of XSS (cross site scripting) attacks. Additionally, it removes all HTML from the string, stopping users from posting links, images, Javascript, etc..
The addMessage() function is slightly more complex, here’s it works –
- Verify the posted CSRF/XSRF token is valid
- Get the anti-spam session data
- Clean the database variables using our
clean()function - Initiate a new validation class
- Pass the validation data to the
check()validation function, along with the validation rule - Check if the validation is passed.
- Create an array of PDO parameters
- Pass the insert query and parameters to the PDO
query()function - Log the post time + 5 seconds for anti-spam
- Return the formatted message
PHP Validation Class
The final PHP class we’ll look at is the validation class. This is used to validate user inputs against predetermined criteria, which will be passed to the class via an array.
Most of the functionality within this class comes from the check() function. Here’s the code for the supporting error functions and class variables.
[php]<?php
if(!defined(‘SITE’)) {
die(‘
<h1>Invalid file access</h1>
‘);
}
class Validation {
// Validation status
private $_passed = false;
// Validation errors
private $_errors = array();
private function addError( $error )
{
$this->_errors[] = $error;
}
public function errors()
{
return $this->_errors;
}
public function passed()
{
return $this->_passed;
}
}
?>[/php]
So far, so good. We have an error function to log validation errors, a function to check for errors, and a function to get the errors. The validation won’t be deemed as successful until the $this->_passed class variable is true.
The check() function is how we interact with the class.
[php]public function check(array $items)
{
foreach($items as $element => $rules_array) {
$field_name = (isset($rules_array[‘field_name’])) ? $rules_array[‘field_name’] : $element;
$value = $rules_array[‘value’];
foreach($rules_array as $rule => $rule_value) {
if($rule === ‘required’ && empty($value)) {
$this->addError( $field_name . ‘ is required’ );
}
elseif( !empty( $value ) ) {
switch( $rule ) {
case ‘max’:
if( strlen( $value ) > $rule_value ) {
$this->addError( $field_name . ‘ must be a maximum of ‘ . $rule_value . ‘ characters’ );
}
break;
case ‘min’:
if( strlen( $value ) < $rule_value ) {
$this->addError( $field_name . ‘ must be a minimum of ‘ . $rule_value . ‘ characters’ );
}
break;
}
}
}
}
if(empty($this->_errors)){
$this->_passed = true;
}
return $this;
}[/php]
And this is how it works –
- Only allow an array to be passed to the class
- Loop through the primary array as elements and the element rules
- Assign the field name – used for error messages
- Loop through the validation rules
- If the rule is “required”, check the value is present
- If not, switch the rule names
- If the rule name is max, check the length is less than the max – if there’s a problem, log an error
- If the rule name is min, check the length is higher than the minimum – if there’s a problem, log an error
- Check for errors, if there aren’t any, flag the validation as passed
Shoutbox / Facebook Chat Javascript
With the majority of the PHP now done, we can look at implementing the JavaScript. This will allow us to run PHP in the background, refreshing data when needed.
We’ll be working with the jQuery JavaScript library. To do this you should include the following between the <head> tags of the index.php page.
[html]<img src="data:image/gif;base64,R0lGODlhAQABAIAAAAAAAP///yH5BAEAAAAALAAAAAABAAEAAAIBRAA7" data-wp-preserve="%3Cscript%20src%3D%22http%3A%2F%2Fcode.jquery.com%2Fjquery-latest.min.js%22%3E%3C%2Fscript%3E" data-mce-resize="false" data-mce-placeholder="1" class="mce-object" width="20" height="20" alt="<script>" title="<script>" />[/html]
The first function we’ll create is the $.get() function. This function is responsible for loading the page data on load into the chat container. It uses a GET AJAX method – the other being POST.
[js]// load the messages when the page is ready
$.get(‘index.php’,{‘page’:’load_chat’},function(data) {
$(‘.chatArea ul’).html(data);
scrollChatBottom();
}).fail(function(error) {
alert(error.statusText);
});[/js]
The function loads the index.php page (the same one that calls it). It passes a GET variable to the index.php page and looks for a response. The response is then loaded into the <ul> within the class .chatarea. We then call a scroll function to keep the chat area scrolled to the bottom. If there’s an error, provide an alert with the error status.
Refresh Chat Data with AJAX
Our next function is very similar, but it involves some extra complexity. We will use the setInterval() function to refresh a $.get call every second.
[js]// refresh the messages every 1000ms
window.setInterval(function(){
$.get(‘index.php’,{‘page’:’load_chat’},function(data) {
$(‘.chatArea ul’).html(data);
var container = $(‘.chatArea’)
var height = container.height();
var scrollHeight = container[0].scrollHeight;
var st = container.scrollTop();
if(st >= scrollHeight – height) {
scrollChatBottom();
}
}).fail(function(error) {
alert(error.statusText);
});
}, 1000);[/js]
The difference between this, and the previous function is the scroll element. As the request refreshes every second, we don’t want to continually send the scroll to the bottom if the user is looking at old messages. This means we need to find out where the user is in comparison to the height of the chat element. If the user is at the bottom of the box when it gets refreshed, then we’ll scroll the chat area down.
Scroll Area to Bottom
Now we’ll look at the scrollChatBottom() function.
[js]// scroll the chat to the bottom
function scrollChatBottom() {
var scrollto = $(‘.chatArea’)[0].scrollHeight;
$(‘.chatArea’).scrollTop(scrollto);
}[/js]
Using some predefined functions we’ll get the height of the chat area, then scroll the box to that height. Simples.
Submit Chat Messages via AJAX
Submitting messages using AJAX uses a POST request, as opposed to a GET request like we’ve previously used. The functionality within jQuery is much the same, simply replacing $.get with $.post. Let’s take a look –
[js]// post new messages
$(‘#chat_message’).keypress(function(e) {
if(e.which == 13) {
e.preventDefault();
var message = $(‘#chat_message’).val();
var name = $(‘#chat_name’).val();
var token = $(‘#chat_token’).val();
data_array = {
‘action’:’chat_post’,
‘message’:message,
‘name’:name,
‘token’:token,
‘type’:’ajax’
};
$.post(‘index.php’, data_array, function(res) {
$(res).hide().appendTo(‘.chatArea ul’).fadeIn(400);
scrollChatBottom();
$(‘#chat_message’).val(”);
$(‘#chat_name’).attr(‘readonly’,’true’);
}).fail(function(error) {
alert(error.statusText);
});
}
});[/js]
Here’s how that works –
- This is a function to be run when a key is pressed in the message box
- If the enter key is pressed (key #13), run the following function
- Assign the data values to variables
- Place the variables in an array, along with other POST data
- Pass the array to index.php via POST
- Add the result to the end of
.chatArea ul, fade the result in over 400ms - Scroll the chat to the bottom
- Reset the message box value to null
- Lock the name box to prevent people using multiple names in 1 session – could be overridden
- Alert the user if there’s an error
So far, so good. The code will submit the data to the master index.php file as that’s where our classes, config, etc… are instigated. We pass a flag to tell the code it’s an AJAX request, stopping all content being appended in the result.
Sliding Chat Toggle
Our final jQuery function for the chatbox / shoutbox will allow the user to toggle hide the box.
[js]$(‘.toggle’).click(function(e){
var toggleState = $(‘.chat’).css(‘display’);
$(‘.chat’).slideToggle(400);
if(toggleState == ‘block’) {
$(‘div.toggle’).fadeIn(400);
}
else {
$(‘div.toggle’).css(‘display’,’none’);
}
});[/js]
This function will be run when the user click’s an element with class="toggle". Next we need to work out whether the chat is currently hidden, then we run the slideToggle jQuery functionality to slide the chat in or out of view. If the chat is currently in view, then we need to display the toggle menu so people can get the chat back, if not, hide the placeholder.
Chat / Shoutbox PHP
We’re almost there! Now we need to finalise the index.php PHP code, allowing us to post and get data via AJAX.
First let’s handle posting data. To do this we’re going to call $chat->addMessage(), sending the data to our chat class. To handle errors we’re going to use Exceptions, wrapping our functions in try and catch blocks.
[php]// Post messages
$post_action = (isset($_POST[‘action’])) ? $_POST[‘action’] : ”;
if($post_action === ‘chat_post’) {
try {
print $chat->addMessage($_POST[‘name’],$_POST[‘message’],$_POST[‘token’]);
}
catch(Exception $e) {
print ‘
<li><strong>Error:</strong> <span style="color:red;">’.$e->getMessage().'</span></li>
‘;
}
return;
}[/php]
We want to print results then stop the code from executing any further with return;, due to the post request being sent via AJAX. Doing it this way stops the body of the HTML being appended within our result – meaning the index.php would duplicate inside itself.
The first line of code may look slightly confusing –
[php]$post_action = (isset($_POST[‘action’])) ? $_POST[‘action’] : ”;[/php]
This is a shorthand if statement that assigns a value to $post_action depending on the result of the if. PHP throws an error when using an unidentified variable. For example, if we call $_POST[‘action’] without it being set, there will be an error telling us it doesn’t exist.. but that might be right. This line checks whether it’s defined, if not then we assign a null value to our post variable.
Our data retrieval process is much the same, wrapped in try and catch blocks, with print and return.
[php]// Build content
$page = (isset($_GET[‘page’])) ? $_GET[‘page’] : ”;
if($page === ‘load_chat’) {
try {
print $chat->getPosts();
}
catch(Exception $e) {
print ‘
<li><strong>Error:</strong> <span style="color:red;">’.$e->getMessage().'</span></li>
‘;
}
return;
}[/php]
The logic is very similar to above, just using different variables and functions.
Chatbox / Shoutbox PHP
Here’s our final index.php code for our chatbox / shoutbox –
[php]<?php
// Load config.php
include_once(‘includes/config.php’);
// Autoload classes
spl_autoload_register( function($class) {
include_once(‘includes/’.strtolower($class).’.php’);
});
// Instigate classes
$db = new Database($mysql_config);
$session = new Session();
$token = new Token($session);
$chat = new Chat($db, $token, $session);
// Post messages
$post_action = (isset($_POST[‘action’])) ? $_POST[‘action’] : ”;
if($post_action === ‘chat_post’) {
try {
print $chat->addMessage($_POST[‘name’],$_POST[‘message’],$_POST[‘token’]);
}
catch(Exception $e) {
print ‘
<li><strong>Error:</strong> <span style="color:red;">’.$e->getMessage().'</span></li>
‘;
}
return;
}
// Build content
$page = (isset($_GET[‘page’])) ? $_GET[‘page’] : ”;
if($page === ‘load_chat’) {
try {
print $chat->getPosts();
}
catch(Exception $e) {
print ‘
<li><strong>Error:</strong> <span style="color:red;">’.$e->getMessage().'</span></li>
‘;
}
return;
}
?>[/php]
Conclusion
Thanks for reading this article. I hope it’s helped your understanding of PHP OOP, jQuery, CSS, HTML, and MySQL. There’s a lot of possibilities with this chatbox / shoutbox for expansion, especially integrating with user systems, and adding emoticons, and special string functions.
Subscribe for Updates
Get notified about my latest content first and receive invitations for subscriber only competitions.